You're about to create your best presentation ever

Best Template For Picture And Text Presentation

Create your presentation by reusing one of our great community templates.

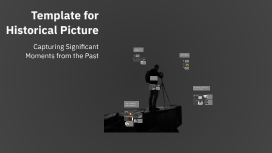
Template for Historical Picture

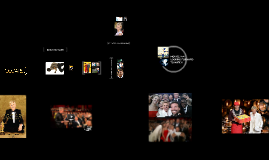
Transcript: NCAT HISTORIC DISTRICT Types of Historical Moments Dudley Memorial Building Introduction to Historical Moments Political Events Political events mark crucial transformations in governance, such as revolutions, elections, and treaties. These moments often redefine national identities and influence international relations, exemplified by events like the signing of the Magna Carta or the fall of the Berlin Wall. Social Movements Cultural Milestones Social movements are collective efforts to bring about social change, addressing injustices and advocating rights. The Civil Rights Movement in the United States and the Suffragette Movement are pivotal examples that reshaped societal norms and legal frameworks. Cultural milestones reflect significant achievements in the arts, literature, and societal norms. Events like the Harlem Renaissance or the introduction of the printing press illustrate how cultural shifts influence collective identities and values across generations. Definition of Historical Moments Historical moments refer to significant events that have marked societal change, cultural shifts, or political transformations. They serve as milestones in the timeline of human experience, shaping historical narratives and collective memory. Innovations and Discoveries Innovations and discoveries drive societal progress and change the course of history. The invention of the wheel, the steam engine, and the internet are landmarks that revolutionized how people live and connect, exemplifying human ingenuity. Importance of Capturing History Capturing history is vital for understanding our origins and the paths taken to reach the present. Documenting significant moments fosters appreciation, promotes lessons learned, and ensures that these events are not forgotten. Overview of Template Purpose This template serves to standardize the representation of historical moments, making it easier to convey their significance visually. By providing a structured framework, it enhances comprehension and appreciation of important historical events. Elements of a Historical Picture Color Schemes and Effects Visual Composition Color schemes can evoke emotions and set the tone of a historical picture. Warm colors might suggest nostalgia, while cooler tones could communicate somberness or reflection, influencing how viewers understand the significance of the moment. Visual composition involves arranging elements within the frame to guide the viewer's eye. Effective compositions may utilize the rule of thirds, leading lines, and balance to create a harmonious and engaging image that highlights historical significance. Subject Focus and Framing Techniques for Enhancing Historical Photos Historical Context and Relevance Subject focus directs attention to important elements within the image. Techniques like selective focus and creative framing emphasize key figures or objects, enriching the narrative and making the historical context clearer and more impactful. Providing historical context is essential for understanding a picture's significance. Including background information about the event, era, or culture depicted allows viewers to appreciate the moment's relevance and the message conveyed by the image. Use of Filters and Textures Incorporating Text and Annotations Adding relevant text and annotations helps provide context to historical photos, guiding viewers in understanding their significance. Text can include dates, locations, or brief narratives that enhance the viewer's connection to the image. Filters and textures can add depth and character to historical photos. Vintage filters mimic the appearance of old photographs, while textures can evoke a sense of age and authenticity, enhancing the overall emotion of the image. Storytelling Through Imagery Utilizing Digital Editing Tools Composing a photo to tell a story is vital in historical photography. Strategic choices in subjects, angles, and scenes can evoke emotions and immerse viewers in a narrative, conveying the importance of the moment captured. Digital editing tools offer extensive capabilities for enhancing historical photos through adjustments in exposure, contrast, and sharpness. Software such as Adobe Lightroom and Photoshop allows for precision editing to revive historic images. Final Thoughts and Resources Recap of Key Points The essence of historical photography lies in selecting pivotal moments, utilizing effective composition, and creating emotional resonance. Understanding these principles empowers creators to capture and convey the significance of history effectively. Visual Representation of History Further Reading and Resources Effective historical photography not only documents events but also conveys emotions and narratives. By focusing on specific settings and subjects, images can powerfully communicate the essence of significant moments. To deepen knowledge in historical photography, consider resources like "Photographic Truths: A Historical Perspective"

Picture Collage Template

Transcript: Picture Collage Template A Ready-to-Use Format for Your Photos Design Elements Incorporate essential design elements such as borders, shadows, and textures to add depth and cohesiveness to your collage. These elements enhance visual interest and help unify diverse images into a quintessential piece. Image Placement Guidelines For optimum appeal, follow practical image placement guidelines. Ensure a balanced arrangement that guides the viewer’s eye, maintaining harmony and focus on key images without overwhelming the overall layout. Layout Options Color Schemes Choose from various layout options to guide your collage design. Options may include grids, overlapping images, or free-form arrangements, allowing flexibility in visual storytelling and highlighting key elements effectively. Selecting a cohesive color scheme is vital for a unified look. Consider complementary colors that not only enhance each image but also evoke the desired emotional response, adding depth to your visual narrative. Template Structure Font Styles This section delves into the fundamental components of a collage template, covering layout options, design elements, image placements, color schemes, and font styles, essential for creating visually appealing collages. Incorporate font styles that complement the overall design while ensuring legibility. Whether opting for playful, elegant, or modern fonts, consistency across text sets the tone and enhances the collage’s message. Purpose of the Collage Tips for Effective Collaging Collages combine several images to convey a unified message or theme. They foster creativity and enable the display of diverse elements in a coherent format, making them particularly effective for storytelling or thematic presentations. To create an impactful collage, maintain a balance of color and imagery. Limit the number of pictures to avoid clutter, and consider the narrative or theme conveyed by your images for coherence. Introduction to Picture Collage Examples of Completed Collages Saving and Exporting the Collage A collage serves as a creative means of showcasing multiple images cohesively. Utilizing a template not only streamlines the process but also enhances the visual appeal and effectiveness of presentations. View examples to understand diverse styles and techniques. Each collage reflects unique stories, illustrating how different layouts, color schemes, and themes come together to create engaging visual narratives. Once completed, save your collage using the 'Save' feature in the software. For sharing, choose 'Export' to generate files in formats like JPEG or PNG, suitable for printing or online use. How to Insert Pictures Customizing the Template Customization allows for a personal touch. Adjust layout proportions, alter color schemes, and apply different fonts to enhance visual appeal. Ensure the design aligns cohesively with the theme of your collage. To insert pictures, select the desired image placeholder in the template. Use the 'Insert' option from the menu to upload images from your device or drag and drop images directly into the placeholder for a seamless addition. Usage Instructions Learn the essential steps to effectively use the picture collage template, focusing on inserting images, customizing your design, and finalizing your project for sharing or printing. Benefits of Using a Template Overview of the Presentation Format The presentation follows a structured format that introduces the collage concept, explains its benefits, and provides practical usage instructions. Each section is designed to enhance understanding and usability of the collage template. Templates save time and ensure consistency in design across multiple collages. They provide a structured framework, allowing users to focus on content rather than design, ultimately leading to more polished presentations.

Effective Picture Replacement in Presentation Slides

Transcript: Effective Picture Replacement in Presentation Slides Clear guidelines for image replacement techniques in presentation templates and best practices to maintain visual integrity. Steps for Logo Replacement Best Practices for Logo Maintenance To replace the logo, first select the existing logo and press the Delete key. Next, insert your new logo and ensure that it is placed in the same position as the original. It is crucial to maintain the logo's original aspect ratio to ensure a professional appearance and consistency with branding. When replacing the logo, remember to avoid stretching or distorting the new logo. This can be done by using the corner handles during resizing. Additionally, verify that the new logo is clear and fits well within the designated space, retaining the design integrity of the template. Caution Against Using Change Picture Option Using the Change Picture option can inadvertently alter the aspect ratio of the placeholder, resulting in potential formatting issues. It is essential to adhere to proper picture replacement methods to maintain the integrity of the slide design. Effective Use of the Template This presentation outlines the key steps necessary for utilizing the provided template efficiently. Topics include picture replacement, logo guidelines, changing background colors, and formatting content properly. Step 1: Delete Existing Picture Select the existing picture and press the Delete key to remove it from the slide. Step 2: Insert New Picture Instructions for Replacing Pictures Click the icon designated for inserting a new picture to add your desired image into the slide. Step 3: Reset Layout Formatting After inserting the new picture, click the Reset button on the Ribbon to ensure the layout formatting and layering is reapplied correctly. Traditional Shapes for Consistency Creative Use of (Im)Perfect Shapes On the other hand, traditional shapes offer a clean and professional look. They are easier to align and maintain consistency throughout the presentation, which can be beneficial for formal settings. (Im)perfect shapes can be utilized creatively to enhance the visual appeal of slides. They allow for unique designs that can captivate the audience's attention and make the presentation more memorable. Creative Use of Shapes in Slides Background Color Customization Steps Enhancing visual appeal through effective use of shapes A straightforward guide to personalizing slide backgrounds for enhanced visual appeal. Conclusion and Q&A Graphical Representation Concept Introduction Implement shapes to create graphical representations of information, simplifying complex data and enhancing understanding. Shapes can creatively enhance the visual appeal of slides by serving various functions such as text wrapping and graphical representation. Text Wrapping This presentation has equipped you with essential guidelines for effectively utilizing the template, covering aspects such as picture replacement, logo guidelines, background color adjustments, and content formatting. We encourage you to ask any questions or seek clarification on the topics discussed. Step 2: Format Background Utilize shapes to creatively wrap text and make the content more engaging, providing a structured layout that is visually appealing. Step 1: Access Design Tab Step 4: Apply Changes Step 3: Choose Color Select Format Background to open customization options. Finalize your choice to update the slide's background. Navigate to the Design tab on the ribbon for layout options. Click the Color icon to select a preferred MDLZ color. Introduction to the template Agenda Overview Instructions for replacing pictures Supports Diverse Content Types Guidelines for logo replacement The template supports a variety of content types, ensuring flexibility in presentation. Users can easily add and format text, tables, charts, and images as needed to convey information clearly. Flexible Content Formatting Options Changing background colors Tailored Slide Design Each slide is designed to effectively accommodate different content formats, ensuring that each element enhances the overall visual appeal and clarity of the presentation. Overview of content formatting options

Now you can make any subject more engaging and memorable