Prezi's camera mode lets you appear on screen next to your slides, the same way a news anchor sits beside the day's graphics. Your face stays in view while your points, charts, and images sit alongside you, so the room is looking at you and your material at the same time instead of choosing between them.
On its own, that solves one problem: it keeps a remote or hybrid audience looking at a person instead of a deck of static slides. It does not solve the other one. Camera mode still leaves you guessing whether anything landed. Pair it with a live poll, a quiz, or a Q&A that everyone joins from a code, and you get both halves: a presenter people actually watch, and a room you can hear back from. This guide covers how to use camera mode well, and how to combine it with the checks and practice activities that turn watching into taking part.
What Is Camera Mode?
Camera mode places your webcam feed directly inside your presentation canvas, so your graphics, bullet points, and data appear beside you instead of behind you. It is the same visual idea television newsrooms have used for decades: a person on screen, key points displayed next to them, information delivered by a face the audience can see.
Traditional slide decks separate the speaker from the content. The presenter narrates while the slide takes up the whole screen, or shrinks to a small video thumbnail while the deck dominates. Camera mode unifies the two: your material appears as part of the same frame you are in, not as something you disappear behind.
You bring the slides you already have, in whatever tool you made them in, and turn camera mode on when you present. Nothing about your deck changes. It comes in exactly as you built it, and now you are visible next to it.
Why On-Screen Delivery Holds Attention, and Why That's Only Half the Job
A visible presenter gives a remote audience something a slide deck alone cannot: a person to focus on. Viewers keep eye contact with a face while still taking in supporting information, instead of splitting attention between a video thumbnail and a wall of text.
That matters more in remote settings, where nobody is sitting next to a colleague who'll notice if they check their phone. A visible, on-camera presenter is harder to tune out than a voice reading slides off-screen.
But holding attention is not the same as knowing whether the material landed. A room that is watching you closely can still leave without understanding the third point you made. That's the gap camera mode does not close by itself, and it's why the strongest sessions put a check for understanding next to the camera feed rather than relying on presence alone: a poll partway through, a quiz at the end, a running Q&A the room can add to at any point. The presentation is where it starts, not where it ends.
Camera Presence and Framing
Position yourself slightly off-center in the frame, leaving room for your graphics on the other side. Keep your eye line on the camera lens itself, not your notes or a second monitor. Looking at the lens is what makes the delivery feel like a conversation rather than a read-through.
Posture carries as much weight as anything you say. Shoulders back, chin level, a slight lean forward to signal energy. Slouching or leaning away reads as disinterest in your own material before you've said a word.
Light your face from the front, slightly above eye level, to avoid shadows under the eyes and chin. Avoid sitting in front of a window; backlighting turns you into a silhouette. A simple ring light or desk lamp positioned correctly gets you most of the way there.
Keep your background clean and intentional. A cluttered space competes with you for attention. A tidy real background usually reads as more genuine than a virtual one.
Keep gestures small and inside the frame. Broad movements that leave the camera view read as chaotic; contained, deliberate gestures that land on your key points add energy without becoming a distraction.
Graphic Overlays and Visual Pacing
Camera mode lets you bring text, images, and charts into view beside your on-camera feed as you talk through them. The goal is restraint: one or two points on screen at a time, not a paragraph. If the audience can read the whole thing, they stop listening to you, so let your voice carry the detail and let the overlay mark the point.
Change what's on screen as you move between ideas rather than leaving one static graphic up for several minutes. Give primary points more visual weight (larger text, a more prominent position) and let supporting details sit smaller or off to the side, so the hierarchy tells the room what matters most before you say it.
Keep transitions quick and clean. Flashy animation pulls focus from the message; the goal is for a graphic to appear to support what you're saying, not to show off the software. Pick a color palette for your overlays and stick with it for the whole session so viewers aren't re-adjusting to a new scheme every few minutes.
Bring the Audience Into It: Checks and Practice Alongside Camera Mode
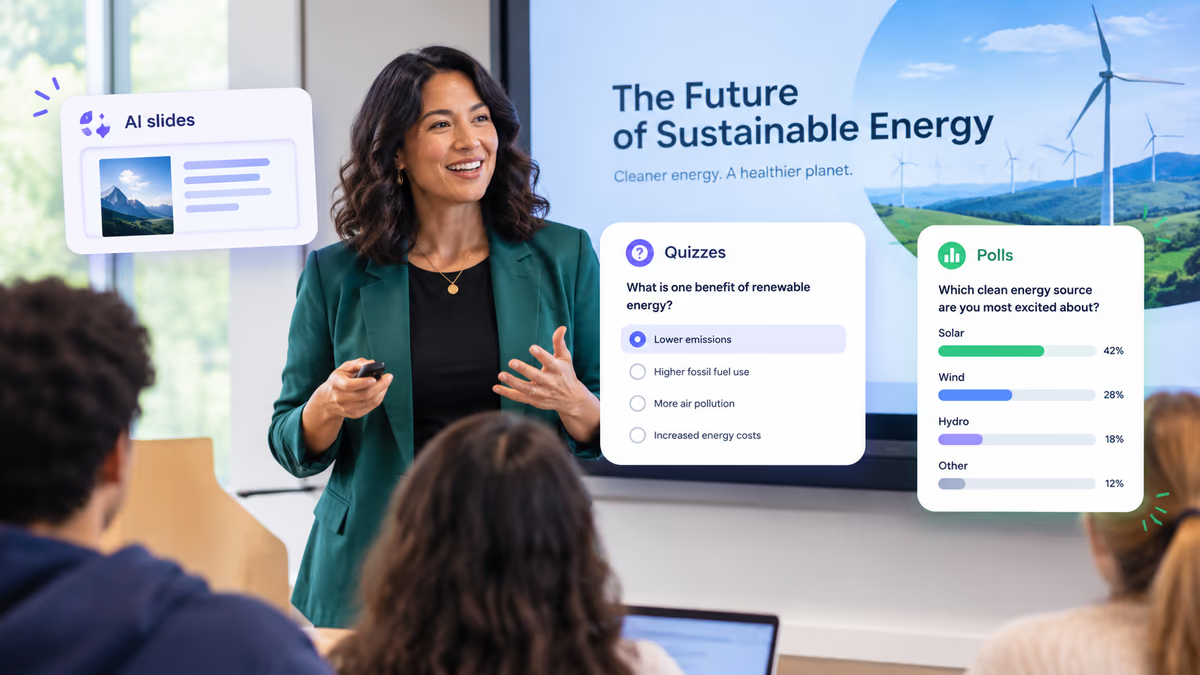
Camera mode changes how you're seen. Pairing it with Prezi's audience response tools changes what the room does while they're watching. These run on the same canvas as your camera feed, and the whole room joins from a QR code or a link, no app and no login required.
Checks for understanding, run live and teacher-driven:
- Poll: a quick pulse check that puts the room's own thinking on screen before you tell them the answer.
- Quiz: see which question broke before the follow-up meeting does, not after.
- Q&A: collects and upvotes questions from people who would never raise a hand on camera, so the quiet half of the room gets heard too.
- Word cloud: an opener that shows the room its own answers back.
Practice and self-learning, for after the room empties:
- Flashcards, an audio summary, and a self-test, generated from the same material, so people who weren't in the room, or want a second pass, get a way in.
The same link you present from becomes the shared page afterward: the recording if you made one, plus the flashcards, audio summary, and self-test, all live on the page you already built. Results by question and an end-of-session feedback digest show you what landed and what didn't, without guessing. Teams tracking completion can export to their LMS with SCORM.
None of this requires a separate tool. It's the same session, same link, same room, whether they're watching you on camera or working through the material after everyone's logged off.
Scripting for Confident On-Camera Delivery
Write for the ear, not the eye. Sentences that read cleanly on paper often sound stiff out loud. Use contractions and shorter sentences, and read your script aloud before you present it. Anything that feels awkward to say will sound awkward too.
Build in verbal signposts: "here's the key point," "let's look at why this matters," "moving to the next part." These cues help an audience follow along the same way transitions do in any spoken narrative.
Match your script to your visual pacing. Mark the moments where a new graphic comes in so your words and the overlay land together instead of competing.
Skip memorization. The goal is delivery that sounds like you're talking, not reciting. A well-prepared script buys you the mental space to focus on pacing and on the room instead of on what comes next.
Camera Mode for Remote Teams and Virtual Classrooms
For a training team, appearing on camera next to quarterly numbers or a compliance walkthrough gives the update more weight than the same material read off static slides. Add a poll on the section people usually skip, and the presenter finds out in the room whether it needs repeating.
For instructors, camera mode addresses a real problem: competing with everything on a student's device. A visible presenter is harder to tune out than a disembodied voice. Add a quiz or a Q&A and you also find out who's actually following, in the moment, rather than at the exam. Remote counts as present the same way it does in person, once the room can answer back.
Pacing matters even more without a physical room to read. Presenters working remotely tend to either rush or lose energy over a long session. Deliberate pacing, clear breaks between segments, a check-in at each one, keeps the energy consistent whether the session runs twenty minutes or two hours.
Recording matters too. A camera-mode session can be recorded for anyone who couldn't attend live, and the shared page still carries the same checks and practice activities afterward, so a recording isn't the only thing they get.
Getting Started
Camera mode needs only a webcam and Prezi. Bring the deck you already have, in whatever tool you made it in, or describe the session you're building and let Prezi draft a starting point. Either way, nothing about your material needs to be rebuilt first.
Design with the overlay in mind: leave space where your on-camera feed will sit, and keep any on-screen text short enough to read at a glance. Turn on a poll, a quiz, or a Q&A before you present, so the room has a way to answer back from the first few minutes.
Practice with the recording feature and watch it back once, specifically for framing, pacing, and whether your overlays land where you meant them to. Your first session in camera mode will feel different from presenting behind a full slide. That adjustment fades fast, and what's left is a session people actually watch, and one you can tell landed.
Frequently Asked Questions
What is camera mode and how does it work in Prezi?
Camera mode places your webcam feed inside your presentation canvas, so your graphics, text, and visuals appear beside you instead of behind you. You control when each graphic appears and where it sits relative to your on-camera image. You can also add live polls, quizzes, and Q&A on the same canvas so the room can respond as you present.
How do I present well on camera in Prezi?
Sit slightly off-center in the frame, keep your eyes on the camera lens rather than your notes, and light your face from the front to avoid shadows. Script your material in conversational language, mark transitions where new graphics come in, and turn on a poll or a Q&A so you can tell whether the room is following, rather than guessing.
Can I use camera mode without a professional studio setup?
Yes. A webcam, a light positioned in front of you at eye level, and a clean background cover the basics. Prezi handles overlaying your graphics onto your video feed, so you don't need separate production software.
How can I get feedback from a remote audience while presenting on camera?
Add a poll, quiz, or Q&A to the same session. Everyone joins from a QR code or a link, no app or login required. Results come back by question, so you can see what landed without waiting for a follow-up email or a test.
What happens to my presentation after the session ends?
The same link becomes a shared page: the recording, if you made one, plus flashcards, an audio summary, and a self-test generated from your material. Anyone who missed the live session, or wants another pass, opens the same page you taught from.
What do I need to get started with camera mode?
A computer webcam and Prezi. Bring in the slides you already have from PowerPoint, Google Slides, Canva, or anywhere else, or describe the session you're building. Turn on camera mode when you present, and add a poll, quiz, or Q&A if you want to hear back from the room while you're on screen.